This chapter contains the following topics:
Printing Work Order History Reports
Work order history under the Reports, kits and View menu selections enable you to print or view work orders after they have been closed.
If you choose not to Use kits in Control information, you may skip this chapter.
After a work order has been closed (using Close work orders), it may be viewed or printed using these selections. Immediate work orders that have been issued may also be viewed or printed using these selections.
If the component usage transactions and/or kit assembly transaction for the work order have not yet been posted (using Inventory), then some or all of the cost information may be omitted from the Work Order History Report. This information will appear on the report after you post those inventory transactions.
These selections apply to immediate work orders as well as to regular work orders. This is also available even if you have responded not to Keep history in Control information.
Work order history may also be purged using the Work Order History Report.
Use this selection to view closed work orders.
Select
Work order history from the View menu.
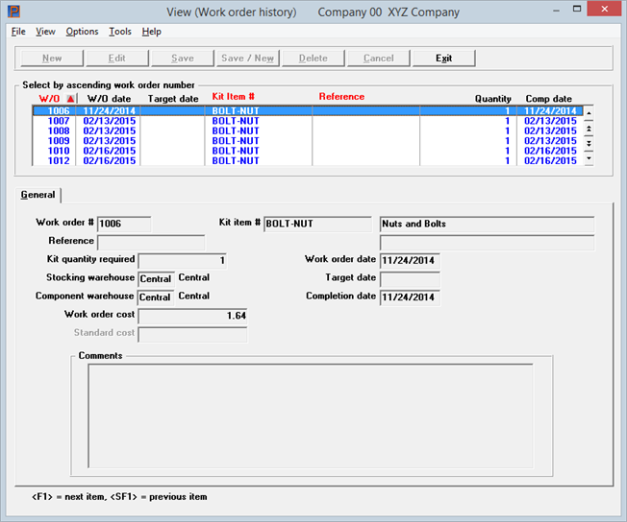
The following screen displays:
Graphical Mode
The list box displays up to 6 closed work orders at a time. You may sort the closed work orders by work order number ,kit item number, and reference all in ascending or descending order. Only column names in red may be sorted. To change the sort direction or field either click on the column name or the arrow to the right of the column name or use the View menu options.
To locate a closed work order, start typing a number or reference, depending on which sort field is selected. You may also use the up/down arrows, Page up, Page down, Home and End keys to locate an item.
The fields for the selected closed work order display in the lower part of the screen.
Select the Exit button to return to the menu.
Character Mode
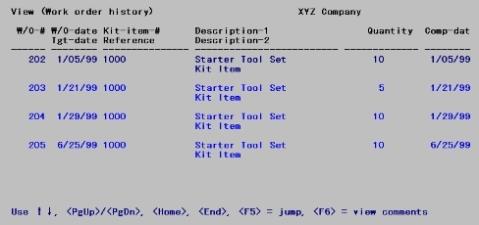
Enter the following information:
Up to five closed work orders display on the screen at one time. To scan through the closed work orders, use the keys as shown at the bottom of the screen (<PgUp>, <PgDn>, <Home>, and <End>).
Options
Other options are:
|
<F5> |
To jump directly to the W/O you wish to view, either by W/O number or reference |
|
<F6> |
To view comments entered for this W/O |
|
<Esc> |
Press this key when you are finished viewing W/O history. |
Use this selection to print and optionally purge closed work orders.
Select
Work order history from the Reports, kits menu.
The following screen displays:

Enter the following information:
Enter a specific kit-item number to print just the work orders that were used to assemble that kit-item, or press <F5> for "All" kit items.
Starting work order number and
Ending work order number
Enter the range of work order numbers to be printed on the report. Follow the screen instructions.
|
Format |
Up to sex digits for each field. |
|
Example |
Press <F2> to enter "First" and "Last" at each field. |
Ending completion date
Work orders that were completed within the range of completion dates entered here are printed on the report. Follow the screen instructions.
|
Format |
MMDDYY for each field |
|
Example |
Press <F2> to enter "First" and "Last" at each field. |
The Stocking warehouse field is available for entry if you are using multi-warehousing:
Work orders are printed on the report if their kit-items were assembled for this warehouse.
Options
Enter a warehouse or use one of the options:
|
<F5> |
For "All" warehouses |
|
<Enter> |
For the Central warehouse (if defined) |
|
Format |
Up to two characters |
|
Example |
Press <F5>. |
Select either Detail for a detailed report or Summary for a summary report. In character mode enter either D or S.
The detail version of the report prints the quantity required for each component, quantity used for each component, total cost for each component and the component warehouse.
|
Format |
One letter, either D or S. |
|
Example |
Type:D, and then press <Enter>. |
Options
Use one of the following options:
|
1 |
Print only |
To print the report without purging work orders from Work Order History. |
|
2 |
Print and purge |
To print the report and purge the work orders selected by the above criteria. |
|
3 |
Purge only |
To purge the work orders selected by the above criteria, without printing the report. |
Select OK. Depending on what you selected for the previous field there are different options:
| • | Print only displays a list of printers of which you may select one to print your report |
| • | Print and purge displays a Purge has been selected - are you sure? message where you verify that you want to purge data. If you select Yes the program displays a list of printers of which you may select a printer. After selecting a printer the program purges the data. Purging make take the system a few minutes. If you select No to the message you are returned to the previous screen. |
| • | Purge only also displays a Purge has been selected - are you sure? warning message asking for verification that you want to purge. When you select Yes, purging data make take the system a few minutes. If you select No to the message you are returned to the previous screen. |